
HELPFUL TIPS

The Felting Process
Read through this entire process before you start felting!
Click below to read more or download PDF for printing.
The only type of washer that I have ever used for felting is a traditional top-loading agitator washer. Knitting friends have used newer front loaders to felt and gotten OK results, but I have no experience with them. Here goes.
Put your washer on the settings for hot water, smallest load, regular wash. Put in a scant tablespoon of wash detergent, powder or liquid. Place one pair of old jeans or a bath towel or two in the washer. Place your bag in the washer once the water has started to fill the tub.
Check the bag after 5 minutes. You may start to see some “fulling” or shrinkage at this point. If not, check again in 5 more minutes. The key is to check your bag frequently to obtain the results you want.* It can take up to 25 or 30 minutes to get the shrinkage you want – be patient!
*Some books tell you to run your project through an entire wash/rinse/spin cycle. I’ve gotten my best results by just turning the dial back to the start of the wash cycle when it’s about to stop ‘wash” and go to “spin/rinse”, effectively just creating a long wash/agitation cycle with no rinse to interrupt the felting process.
After you see shrinkage or fulling/fluffiness, start to check your bag every three to four minutes. Use rubber gloves – this is hot water! You should start to see significant changes – your stitches and rows blending together and the bag really shrinking. Now it’s up to you to determine how heavily felted you want your bag to be. The longer it’s agitated, the more it will shrink and the tighter and thicker the felted fabric will become. I tend to like pretty tight felting, as once the bag is dried and in use the “fabric” is more stable and will stretch very little. They tend to hold their shape better than a more lightly felted bag.
Once the bag is the size you want, put your washer setting to where it spins to get the wash water our of the wash tub, pre-rinse. Let the bag spin for just a minute to get some of the water and suds out of the wool. Take it out of the washer. Allow the spin to complete to empty the dirty water out of the washtub. Then reset the washer to rinse on a cold water setting and put the bag back in. This helps to “set” the bag, and really interlock those felted fibers. When the spin cycle starts, let the bag spin until almost all of the water is out of the washer. The bag will feel stiff and just a little wet. Take your bag out of the washer. What I’ve found is that if you let the bag spin until the cycle is done and items are really “spun dry”, bags sometimes develop creases or a strange ridge that you cannot pull or press out of the bag – a big disappointment after all of your work.
*Sometimes it is recommended that you put your project in a zippered lingerie wash bag or bed pillow cover. I’ve tried it a few times and found that you run a risk. An unfelted purse is fairly large, and when confined in a bag has a tendency to felt to itself or develop thick ugly creases. When this happens, it is nearly impossible to undo the damage.
Over the past few years I have knit a number of bag patterns several times. Same brand of yarn, same numbers of stitches and rounds, and every time the bag turns out a little different from the last. Some of it has to do with the fact that different color dyes are made with different chemicals. When you add hot water, detergent and agitation, the wool fibers start to break down differently due to the various chemical properties. You’ll notice that some bags shrink and felt quickly while others will take much more time. That’s why you always want to check your bag OFTEN while felting! The point of all of this is to say that the unfelted and felted measurements in the patterns in this book are approximate sizes your bags will end up. This process is equal parts art, science and magic. Sometimes you’ll even encounter a “happy accident.” You’ll know what I mean when it happens to you!
Finishing Techniques
How you finish your felted bag is probably the most important part of the process!
Click below to read more or download PDF for printing.
How you finish your felted bag is probably the most important part of the process. After all of your hard work knitting and actually felting in the washer, the shape, texture and overall appearance will be determined by tools and techniques that you employ to get your bag ready for whatever embellishment you choose.
Once your bag is out of the washer, form it into the finished shape you want it to be once it is dry. Stand it up on its bottom and pull the sides apart so that the inside is as round, oval or square as you want it. Holding the side or bottom of the bag, tug at the top rim until straight to your satisfaction. If the bottom seems a little uneven, tug or gently pull the bag into the shape that you want. Once you are satisfied with the shape of the bag, loosely stuff it with plastic bags. Put it on a towel and let it air dry. It may take 2-3 days for it to completely dry.
Now you can complete the finishing process. This process should take 5 – 15 minutes, depending upon how fuzzy your bag turns out. The following are the tools I have on hand to create a consistent and attractive finished bag that is ready to embellish and decorate:
- small pair of sharp scissors
- disposable shavers, lint brush, any sort of tool the takes pilling off of sweaters
- electric horse or dog clippers
- Sweater Stone www.sweaterstone.com, also available at discount department stores and some yarns stores)
Start by actually “shaving” the bag with a disposable razor. Don’t be afraid to use a little pressure. You will start to see a textured surface getting uncovered. If you need to get more aggressive with fuzz or fluff removal, use the sweater stone until you get the finish you like. I use horse clippers for a fast and consistent surface.
You may alternate between the tools to get what you are looking for – just experiment until you are happy with the outcome. Continue shaving until you like the surface. Use your small scissors to trim around the top edge of the bag so that you have a very crisp finished top. Then finish with a lint brush to remove any little pieces of wool that have gotten stuck to the surface. At this point, lightly steam your bag with a very hot steam iron with a damp towel over the surface. Light pressure and a lot of steam should give you a lovely surface to decorate. This is a great way to ensure a nice consistent surface on your bag.
Embellishment Options and Techniques
OK – you’ve done a beautiful job knitting and felting your bag and are ready to decorate it and make it uniquely yours. NOW WHAT???
Click below to read more or download PDF for printing.
OK – you’ve done a beautiful job knitting and felting your bag and are ready to decorate it and make it uniquely yours. NOW WHAT???
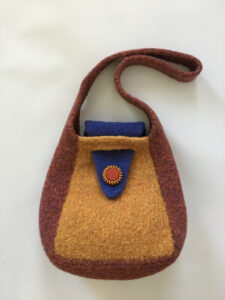
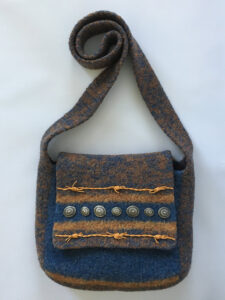
There are many options for bag decoration, and no limit to the different looks you can achieve. Here are a few of the different techniques that are simple and fun to get you started.
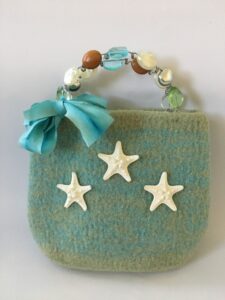
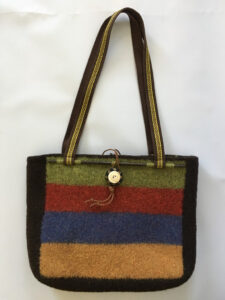
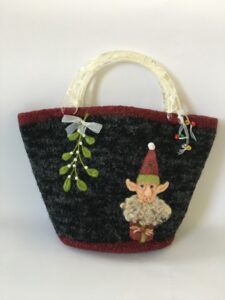
Button stacking – if one button is good, are two or three great? Find buttons in complimentary colors and graduated sizes that match your bag and “stack” them on top of each other before you sew them on. They add an almost sculptural quality to your work and a lot of visual interest.
Ribbon – sometimes nothing more than a beautiful bow is all you need tied to the handle of your bag to make it beautiful. Double up your ribbon for a fuller more feminine effect.
Lace – a lace strip sewn across the front of your bag says “girl” and “formal”. A half yard will do it, so splurge on something great!
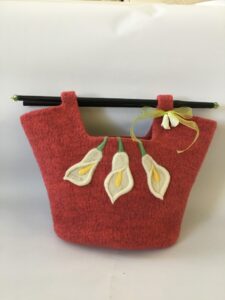
Fabric flowers – find silk flowers or leaves you love and simply sew them on your bag.
Beading – beads can create a number of great effects – sparkle, ethnic, funky, elegant or handmade. Many of the large chain craft stores have a great selection in every color and texture. Sew them on with clear fishing line for an embellishment that can easily stand up to everyday use.
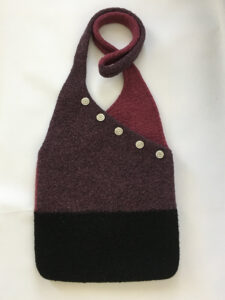
Jewelry findings – look around a chain craft store in the jewelry department. There are beautiful medallions, closures, chains, and all sorts of fun items you could use on a bag.
Fabulous handles – a special handle can be a great foundation for your overall look! Google “bag handles” or look around your favorite craft or sewing store.
Want to try your hand at something more challenging? Here are a few more ideas…
Needle felting – there is no end to the options you have when you “paint with fleece.” It takes a little practice, but needle felting allows you to work 2-D or 3-D, combine colors, and do abstract or very literal art on your bag. All it takes is some fleece, a single felting needle and your imagination. There are many tutorials on YouTube.
Knitted and felted flowers and leaves – there are many websites and patterns for flowers and leaves you can knit, felt, and then apply to your bag. Check on line for ideas. This is a good way to use up some of your worsted wool stash!
Most importantly…just have fun with this! There is no right or wrong. You are a designer in your own right!